Jobs
Job Creation
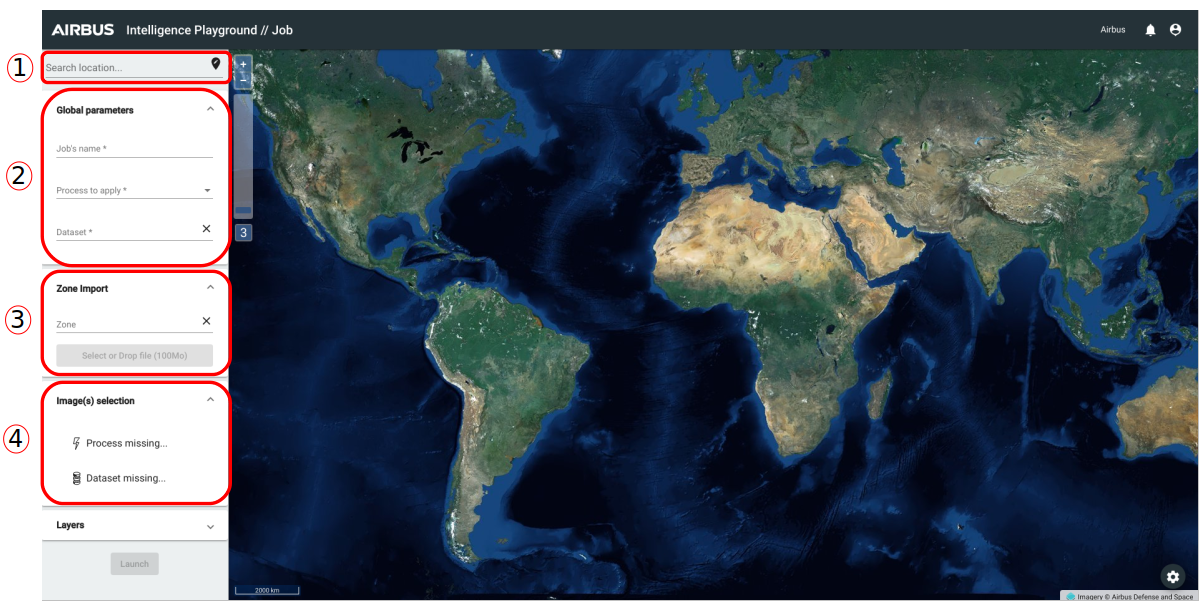
- To create a new job, you have to enter a location (or zoom on a specific location on the map) to access to the images.
- Then, in "Global Parameters" you have to choose a job's name, a process to apply and choose an existing dataset. When this step is done, you have to choose an image (or two images for a process of change detection), and then you have two possibilies : import a zone or draw a zone.
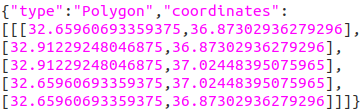
- Choose a zone. For that you have to click on "Select or Drop file" and import a local GeoJSON file (max 100 Mo and one polygon). Example of GeoJSON file format for the import (keep just the geometry part) :
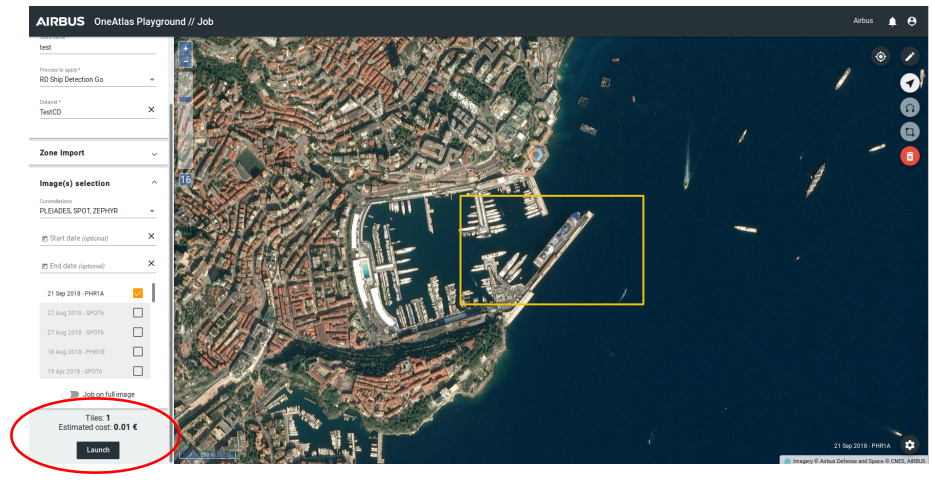
- Draw a zone. If you want to create a zone to apply the process click on
 to access to drawing zone tools (to select/draw/delete a zone). Or you can apply the process on full image.
When you have your zone you can click on Launch to apply the process. You can see the number of estimated tiles and the estimated cost.
Job List
In this section you can access to all of the jobs already created. For that you have different functions.
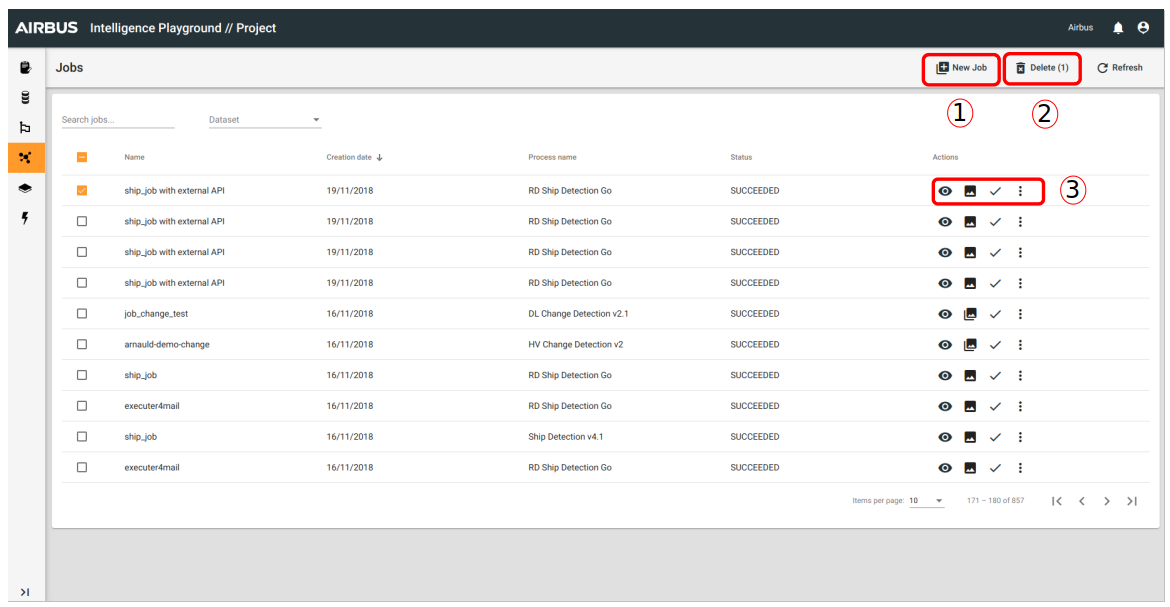
- To create a new job
- To delete all of the selected job(s)
- For all jobs you can choose an action on the column "Actions" :
- Visualize job : You can see results of the selected job and the details about the status of them.
- Object Detection (or change detection, it depends on the process) :
- View : You can see zones and records of the selected job.
- Edit : It enables you to modify the job, you can access to all of drawing tools of the map. You can see the Dataset Page for further details.
- Validation
- More : Duplicate, Download as GeoJSON and Download as KML